
Candles are an easy-to-use source of emergency lighting and a little bit of heat. I'm shocked to see some of the prices that are charged for long burning candles sold for survival or emergency preparedness - if you want to buy a dozen or so candles, the cost really starts to add up.
Never fear! You can make your own survival candles at home for cheap, using high-quality, long burning soy wax. It's an easy project - the materials are easy to buy and you won't need any specialized tools.

The materials you will need are:
- Soy wax flakes. These are commonly used in making scented candles and are sold in craft stores or Amazon. I bought a 5 pound bag from Amazon for 12.79 shipped - right here. A pound of wax will fill around a 24 ounce container, give or take. You can use other wax, but soy is affordable, typically has a longer burn time than other waxes and has some other beneficial qualities (all-natural, renewable, etc.).
- Canning jars. I purchased a dozen 8 ounce jars from Wal Mart for around $8. If you have jars around the house, no need to buy 'em. We've used jars from jams, sauces and so on for candles in the past.
- Wicks and Tabs. You can find these on Amazon, eBay and at your craft stores. You'll want your wicks to be a bit longer than your candle holder is tall. I have 100 tabs and 100 nine inch wicks on eBay for about $10 total.
- Scissors: For cutting the wicks to size
- Double Boiler: For melting the wax. I don't have an actual double boiler, so I just get a large pot, fill it about 1/3 to 1/2 of the way with water, and then nest a slightly smaller pot inside.
- A Pouring Device: I just used a pyrex measuring cup.
- Protective Gloves: We'll be using boiling water and hot wax, so you want to keep you hands safe.


Put your wicks in the jars. Don't worry if they're not centered - we'll fix that after we pour the wax. Now it's meltin' time!


Carefully transfer the melted wax into your pouring container. Then, pour away! Don't worry about the container - soy wax is all natural, non-toxic and cleans up fairly easily. Beware if you have a soy allergy, though.

Don't fill the jar up the whole way - leave some room between the wax and the top of the container. You'll want to center the wicks at this point. Then, take a break and let the wax cool and harden up. Almost done!

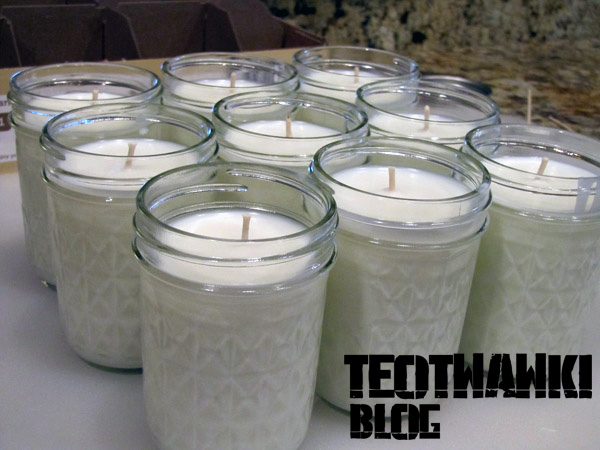
Last step. After the wax has cooled, trim the wicks as needed--you want the wick to be about 1/4" above the wax. Then, screw the lids on and you're ready for storage!
While some advertise 70+ hours of burn time for 8 ounce candles like this, they're more in the ballpark of 40 to 50 hours, and you'll get the most life out of them if you burn the candles four hours at a time. Since you would only use the candle for about 4 hours every evening, a single candle should last for around 10 days of regular use. Not bad! You can of course use different sized jars--bigger for longer burn time, or multiple wicks for more light.
Including the purchase of new jars, my cost per candle is around $1.62. With recycled jars, it's under a dollar.
These aren't crap materials, either--these are the same quality of materials use for high-end aromatherapy candles that sell for $20 a pop. Another plus - the combination of soy wax's lower melting point and the protective glass jar make this a safer source of light when compared to other candles, oil lanterns and so on.
One modification that I plan to make it to include a booklet of matches inside of each jar - cheap and makes sure you've got a way to light the candle if it's pulled out of storage during a power outage, etc.
Anyways, give it a shot and let us know how it goes! Have fun!
EDIT: Thanks to all of the Pinners who have helped share these instructions. Please do not copy/paste this to your website and claim it for your own. Give credit where it is due.
6/5: Check out our new how-to for making beeswax survival candles!